Connect distributed clients to a private InfluxDB database

Glenn Gillen VP of Product, GTM
Published 2023-03-9

InfluxDB has become a popular way for sensors and services to store time-series data, and InfluxData makes that quick and easy thanks to InfluxDB Cloud. Some of the customers we've spoken to aren't storing everything in a managed cloud service though. Sometimes they've specific business, regulatory, or compliance reasons to store the data themselves in their own data center. Other times they're using multiple outputs in Telegraf to send data to both InfluxDB Cloud as part of their disaster recovery plan.
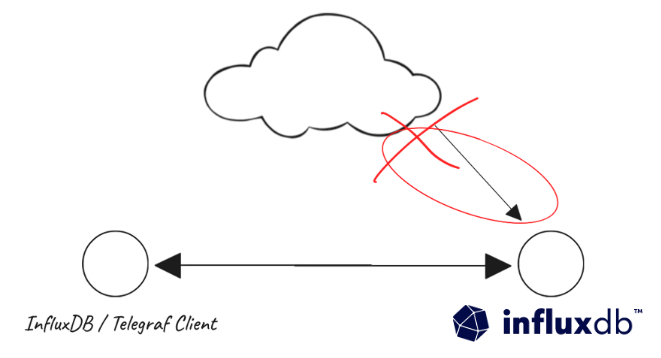
Whatever the reason, having a single client connect to a private InfluxDB database securely potentially involves setting up network routes, opening up firewalls, adjusting NACLs and security groups. Not to mention navigating whatever internal processes might be involved to get all those changes approved and deployed. The value of InfluxDB isn't about having just one client writing data occassionally, it's about being able to support hundreds or more. So repeat that network administration overhead for each new device, or whenever a device's network configuration changes, and you've very quickly got a situation where maintaining those tight network controls becomes unsustainable. Most people would then weigh up between a couple of options: 1) Require a VPN be established between the remote client and the network InfluxDB database is in. (Potentially) Less on-going admin for the network admins where InfluxDB is running, but a higher setup burden for whoever is managing the clients. And do they really want their network connected to yours via a VPN? Or 2) Expose the InfluxDB database directly to the public internet, and trust the authentication system to be enough to protect it.
Today I'm going to take you through a third choice. It'll only take a few minutes to implement, require no network changes, and will prevent you from having to put your private database onto the public internet. We'll also get a whole host of other benefits thrown in along the way which I'll cover once we've got it working.
Initial setup
If you'd like to jump straight into a working example of this, we have available on GitHub an InfluxDB + Telegraf + Ockam demo for Docker that you can run locally with Docker Compose. It uses the official Docker images for InfluxDB and Telegraf, with changes to the startup scripts so each service uses Ockam to establish a connection. Full instructions on how to run it are included in the README.
To simulate an end-to-end example of a client sending data into InfluxDB we're going to start a Telegraf instance, have it emit CPU events to InfluxDB, and then change the way those two connect to show how we'd connect them across different hosts or networks. For the sake of this example though, we'll be running everything on a single machine.
Ockam
If you’ve previously setup Ockam you can skip this section and move straight to setting up InfluxDB below.
_10brew install build-trust/ockam/ockam
(if you’re not using brew for package management we have installation instructions for other systems in our documentation)
Once installed you need to enroll your local identity with Ockam Orchestrator, run the command below and follow the instructions provided:
_10ockam enroll
InfluxDB
If you've already got InfluxDB running on your local machine and have an authentication token you can use to write to it you can skip this section and move straight on to installing Telegraf below.
The prerequisites for this section are to first install:
Once installed we need to start InfluxDB so that we have somewhere to store the metrics data we're going to generate. On most systems that will be as simple as running:
_10influxd
You should then see some log output, with the final line confirming that influxd is now listening on port 8086:
_102023-02-21T23:49:43.106268Z info Listening {"log_id": "0fv9CURl000", "service": "tcp-listener", "transport": "http", "addr": ":8086", "port": 8086}
If influxd started successfully then you can open a new terminal session and leave this running in the background. If influxd did not start successfully check the official documentation for some common issues for different operating systems.
Now we're going to use the influx CLI command to complete the initial database setup so that influxd can receive our data. Run the setup command and complete the required prompts, remember the organization and bucket names you use as we'll need them later:
_10influx setup
Next you'll need copy the token for the user you just created, which you can retrieve with the auth command:
_10influx auth list
Telegraf
Install Telegraf, and once it's setup we'll need a configuration file that defines our input source and our output destination. Telegraf thankfully includes a command to generate such a file, which we can specify to be preconfigured with the CPU utilization of our host machine as an input source and with InfluxDB as our output.
To generate the base configuration run:
_10telegraf config \_10 --section-filter agent:inputs:outputs \_10 --input-filter cpu \_10 --output-filter influxdb_v2 > telegraf.conf
Open the generated telegraf.conf file and find the [[outputs.influxdb_v2]] section which should look like this:
_16[[outputs.influxdb_v2]]_16 ## The URLs of the InfluxDB cluster nodes._16 ##_16 ## Multiple URLs can be specified for a single cluster, only ONE of the_16 ## urls will be written to each interval._16 ## ex: urls = ["https://us-west-2-1.aws.cloud2.influxdata.com"]_16 urls = ["http://127.0.0.1:8086"]_16_16 ## Token for authentication._16 token = ""_16_16 ## Organization is the name of the organization you wish to write to._16 organization = ""_16_16 ## Destination bucket to write into._16 bucket = ""
Replace the empty values for token, organization, and bucket with the values from the previous section about setting up InfluxDB and save you changes. You can now start Telegraf:
_10telegraf --config telegraf.conf
Check it's all working
To make it easy to re-use your values for future commands and testing, store the appropriate values (i.e., replace the placeholders below with your actual values) into a series of environment variables:
_10export INFLUX_PORT=8086 \_10 INFLUX_TOKEN=your-token-here \_10 INFLUX_ORG=your-org \_10 INFLUX_BUCKET=your-bucket
Now we can check that Telegraf is regularly sending data to InfluxDB. The configuration we created earlier will emit CPU stats every 10 seconds, so we can send a query to InfluxDB and as it to return all data it has for the past 1 minute:
_10curl \_10 --header "Authorization: Token $INFLUX_TOKEN" \_10 --header "Accept: application/csv" \_10 --header 'Content-type: application/vnd.flux' \_10 --data "from(bucket:\"$INFLUX_BUCKET\") |> range(start:-1m)" \_10 http://localhost:$INFLUX_PORT/api/v2/query?org=$INFLUX_ORG
Securely connect Telegraf + a private InfluxDB with Ockam
The example above connects these two services, running on the same host, by using the default unencrypted HTTP transport. Most non-trivial configurations will have InfluxDB running on a separate host with one or more Telegraf nodes sending data in. In production it is unlikely that an unencrypted transport is acceptable, it's also not always desirable to potentially expose the InfluxDB port to public internet.
In this section we'll show you how both of these problems can be solved with very minimal configuration changes to any existing services.
Creating and enrolling your nodes
The first step is to enroll yourself with Ockam, and create enrollment tokens for your InfluxDB and Telegraf nodes:
_10ockam enroll_10export OCKAM_INFLUXDB_TICKET=$( \_10 ockam project ticket --attribute component=influxdb --relay "influxdb")_10export OCKAM_TELEGRAF_TICKET=$( \_10 ockam project ticket --attribute component=telegraf)
Now we can create a node for our InfluxDB service:
_17ockam identity create influxdb_17_17ockam project enroll $OCKAM_INFLUXDB_TICKET --identity influxdb_17_17ockam node create influxdb --identity influxdb_17_17ockam policy create \_17 --at influxdb \_17 --resource tcp-outlet \_17 --expression '(= subject.component "telegraf")'_17_17ockam tcp-outlet create \_17 --at influxdb \_17 --to 127.0.0.1:8086_17_17ockam relay create influxdb \_17 --to influxdb
There's a few things that have happened in those commands, so let's quickly unpack them:
- We've created a new node called
influxdb, and enrolled it with Ockam using the token we'd generated earlier. If you look back at the command that generated the token you'll see we also tagged this token with an attribute ofcomponent=influxdb. - We than added a policy to the
influxdbnode, which states that only nodes that have acomponentattribute with a value oftelegrafwill be able to connect to a TCP outlet. - Next we create a TCP outlet. This is like a pipe from the
influxdbnode we've just created to the TCP port of127.0.0.1:8086(i.e., the port our InfluxDB database is listening on). This Ockam node will now pipe any data it receives from other nodes through to that destination. However the only nodes that will be able to establish that connection are those that pass the policy defined in the previous step. - Finally we create a forwarder on our project, which now allows other nodes in our project to discover the
influxdband route traffic to it.
It's now time to establish the other side of this connection by creating the corresponding client node for Telegraf:
_11ockam identity create telegraf_11ockam project enroll $OCKAM_TELEGRAF_TICKET --identity telegraf_11ockam node create telegraf --identity telegraf_11ockam policy create \_11 --at telegraf \_11 --resource tcp-inlet \_11 --expression '(= subject.component "influxdb")'_11ockam tcp-inlet create \_11 --at telegraf \_11 --from 127.0.0.1:8087 \_11 --to /project/default/service/forward_to_influxdb/secure/api/service/outlet
Now we can unpack these three commands and what they've done:
- As before, we've used the enrollment token we generated to create a new node and registered it with our project. This time it's the
telegrafnode. - We've again applied a policy to improve our security posture. This policy allows a TCP inlet to be created, but only if the node at the other end has the attribute
componentwith a value ofinfluxdb. - Finally we create the TCP inlet. This is a way of defining where the node should be listening for connections (in this case on TCP port
8087), and where it should forward that traffic to. This node will forward data through to the forwader we created earlier, which will in turn pass it to our influxdb node, which then sends it to the InfluxDB database.
That's it! The listener on localhost port 8087 is now forwarding all traffic to InfluxDB, wherever that is running. If that database was on a different host, running in the cloud, or in a private data center the enrollment and forwarding would still ensure our communication with 127.0.0.1:8087 would be securely connected to wherever that database is running.
Update the existing configuration to use the secure connection
This example created the TCP inlet on port 8087 primarily because the influxd service was running on the same host and already bound to port 8086. In a production deployment where Telegraf and InfluxDB are on separate hosts the TCP inlet could listen on port 8086 and this default configuration would not need to change.
While this is a simplified example running on a single host, the following instructions are the same irrespective of your deployment. Once the influxdb and telegraf nodes are enrolled and running, the only change you need to make is to update your telegraf.conf to point to the local listening port:
_10[[outputs.influxdb_v2]]_10 urls = ["http://127.0.0.1:8087"]
Restart the Telegraf service, and we can then check that it's still storing data by using the same command we used earlier.z
Securely connected clients, and more...
The example here has, in less than 10 minutes, solved our most pressing issue while adding in a number of valuable improvements that aren't immediately obvious because they've been abstracted away:
- Private databases stay private: Your InfluxDB hasn't had its port exposed to the public internet, and so there is no route for third-parties to access your server.
- Encrypted in transit: The secure channel that is established between your nodes is encrypted end-to-end. Each node generates its own cryptographic keys, and is issued its own unique credentials. They then use these to establish a mutually trusted secure channel between each other. By removing the dependency on a third-party service to store or distribute keys you're able to reduce your vulnerability surface area and eliminate single points of failure.
- Identity & Attribute Based Access Control: Authorization to even establish a route to the InfluxDB database is tied to the unique identity of the client requesting access, which is both more flexible in terms of support modern and often dynamic deployment approaches and also more clearly aligns with our intentions around access control. If they client is able to establish trust that they are who they say they are then they are able to route their packets to the database. Contrast that to historical approaches which a permanent access decisions based on assumptions about the remote network (e.g. is this request coming from an IP addess we have pre-authorized?). This is in addition to the authentication and authorization controls on the InfluxDB database itself which will continue to work as they always have.
- Secure-by-design: The combination of all of the above means that the only way to access the InfluxDB database is over a secure channel, which means all communication is encrypted in transit irrespective of any misconfiguration at either end (e.g., HTTP/TLS not being enabled). And because each node exchanges credentials with each other rather than sharing a common certificate or shared encryption key you can also be sure that:
- No other parties in the supply-chain are able to modify the data in transit. The data you receive at the consumer is exactly what was sent by your clients.
- That only authorized clients can write to InfluxDB, ensuring that the data in your topic is highly trustworthy. If you have even more stringent requirements you can take control of your credential authority and enforce granular authorization policies.
- Reduced vulnerability surface area: Ockam simplifies client access concerns by exposing all remote services as local services. We call this virtual adjacency. When all remote components of an application become virtually adjacent to every other component, then the security and trust complexity of the entire network, the entire infrastructure, the entire internet is completely abstracted away. All third party intermediaries are removed from the app's vulnerability surface.
Next steps
- If you haven't already followed the example in this guide, you can get started using Ockam for free by following the instructions in our documentation.
- If you’d like to talk specifically about this or other potential use cases for Ockam, the team would be more than happy to chat with you.
- Alternatively you can join us, and an ever growing community of developers who want to build trust by making applications that are secure-by-design, in the Build Trust community Discord server or on Github.
Previous Article
Rewriting Ockam in Rust
Next Article
How to grow an OSS community on GitHub